Mirro Pressure Cooker Parts
How do I find my model number?
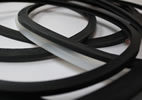
Coe Labs Acri-Dense Pneumatic Curing Unit Gasket
Mirro Pressure Cooker and Canner Instructions, Mirro Manuals
These Mirro instructions requires Adobe Acrobat Reader to view. Instruction manuals are a current version and a various manuals from 1947-2004.| Printed in 1947 | models: For 2.5 quart and 4 quart pressure pans. M-0392, M-0394
|
| Printed in 1949 | models: For 6 quart and 8 quart MIRRO MATIC pressure pans and canners. M-0396, M-0398
|
Mirro Matic "Deluxe Pressure Pan" recipes, directions & time tables Printed in 1958 |
|
| Printed in 1961 |
|
| Printed in 1972 | models: M-0404, M-0404-35, M-0404-37, M-0404-39, M-0436, M-0436-35, M-0436-37, M-0436-39
|
| Printed in 2004 |
|
| Current Pressure Cooker Manual | models: Current Mirro Pressure Cooker Models
|
Mirro Pressure Cooker Overpressure Plugs 9888 and 9732
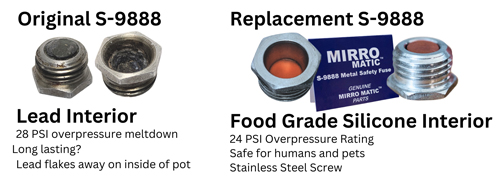
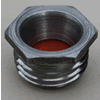
9732 -The original version was a red pop-in neoprene rubber plug. That version has been replaced with the after-market 9732 black silicone plug. That replacement has an overpressure rating of 22-24 PSI.
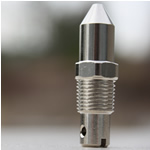
9888 - The original manufactured part is metal with a leaded interior. Handy because it is still functional through time. If you're noticing any apparent chipping on the plug it should be replaced. Studies have not been conducted on the safety of leaded overpressure plugs and these cookers and canners are no longer covered with any liability or warranty.
The replacement 9732 is a screw in plug with a stainless steel metal casing and red silicone interior. The red silicone has an overpressure rating of about 23-25 PSI.
How is the overpressure rating determined?
Only our replacement 9888 over pressure plugs are independently lab tested in batches of 1,000.
How to replace your S-9888 screw in metal safety fuze?
The most important thing is to protect the threading of your aluminum lid.
You will need:
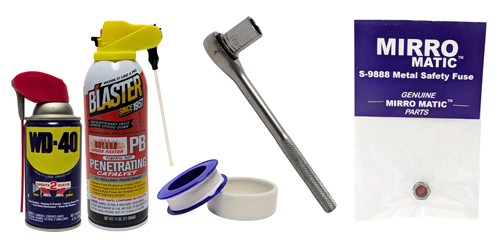
2. WD-40 or PB Blaster
3. Socket wrench 9/16" or 14mm
4. Plumbers Tape (optional)
Procedure:
Step 1: Use WD-40 or PB Blaster on and around the plug for a few hours at least before carefully unscrewing it with a socket wrench lefty loosey.
Step 2: Wrap threading of replacement plug in plumbers tape. Wrap in the same direction the treads go so the tape does not unwind upon screwin. You do not have to use plumber's tape. Anytime you replace something in an aluminum lid it is subject to bubbling that does not impact pressure. Plumbers tape prevents this.
Step 3: Use the socket wrench to screw in the new plug.
